Welcome to Bob & Eileen's web site. Bob generally blogs here while Eileen blogs over at her site. You can see our photos from here or click the little camera in the upper right corner.

Calendar

April 2024
S M T W T F S
 123456
78910111213
14151617181920
21222324252627
282930  

April 19, 2008

More on Inkscape + DXF

Filed under: Machining,Software — Bob @ 9:16 am

I wrote a few days ago about my work on a better DXF export module for Inkscape. I was using it again today for my upcoming CNC milling efforts and found a few bugs plus added another feature.

There is a bug in Inkscape’s simpletransform.py when it attempts to handle transformations of scale, rotate, etc.

I also improved my own exporter and added a feature that creates POINT entities instead of LINE entities for objects on layers that end in the word “drill”. SheetCam uses POINT objects for drilling and I didn’t have an easy way to create them. There really isn’t a way to turn this behavior off (other than not end your layer names with “drill” so if you end up using this extension, be aware of this). It works best with small rectangles because it will compute the center point of the path bounding box as the location for the POINT. I just create small rectangles the same size as my drill hole.

I also corrected the list of dependencies in the better_dxf_output.inx file.

For anyone who is interested, visit this page to download all of the required files.

April 17, 2008

DXF export from Inkscape

Filed under: Machining,Software — Bob @ 8:34 pm

I’ve been using SheetCam to generate g-code for my CNC mill and so far I’m pretty happy with it. It probably isn’t the top-of-the-line CAM software available but its (so far) doing the job for me. SheetCam consumes DXF files – a vector format originated by AutoCad. So I needed something that would generate DXF and I wanted something simple. Someday I’ll probably want to invest in a high-end CAD program but for now I really wanted something very simple and very cheap or even free. I immediately thought of Inkscape, the free vector drawing program for Windows and Linux.

I’ve been using Inkscape for other projects for quite a while and I had noticed it would export to DXF so I thought I was all set: just draw my part outlines in Inkscape and export a file for SheetCam. My first experiment with one simple path object was successful so I optimistically figured everything else would simply work. Oh that would have been too easy…

First I discovered that the Inkscape DXF export doesn’t support layers. It also doesn’t support objects other than paths (Inkscape treats rectangles and circles and such as objects other than basic paths) so my exported files were mostly blank. Although figuring out these problems took quite a while because I (naively) thought all of this would simply work so I didn’t bother to research it very deeply from the start.

So I started to dig into the problem in the Inkscape bug database and sure enough there were two additional problems highlighted:

  1. the DXF export did not support objects with the “transform” attribute; this meant that sometimes objects were simply in the wrong position and it was hard to know when it could happen without exceptionally detailed proof-reading
  2. the DXF export didn’t produce “usable” DXF for at least some readers; SheetCam wasn’t mentioned by name but it seemed that maybe it wasn’t an uncommon problem

Through my own experimentation I found that SheetCam didn’t import the SPLINE objects from the DXF correctly (they were highly distorted). I will say that the SheetCam support was very helpful in explaining the problem as well as making a couple of useful suggestions that I could do inside Inkscape manually.

It worked, but I really wanted an automated solution to as many of these problems as possible.

Fortunately I discovered that Inkscape’s export module is written in Python and I could easily modify it. So I rolled up my sleeves and made my own version of the DXF export module that solves my problems. I started with the updated version from that Inkscape bug but added logic to save the layer identifier for each object and (using a separate Inkscape module) convert cubic paths into line segments (flattening) automatically. I also fixed up the problem with the “transform” attribute. It still doesn’t deal with arbitrary object types but that is pretty easy to solve (Select All, Convert Objects to Paths).

So now its back to the design stage for my next milling project!

For anyone who is interested, visit this page to download all of the required files.

April 6, 2008

CNC Controller Software

Filed under: Machining,Software — Bob @ 9:01 pm

Today I spent a few hours experimenting with Mach3 vs. EMC2 (the leading Linux based alternative) for running my CNC mill. I was initially skeptical of EMC due to the fact that it didn’t seem to have a lot going for it except for the (lack of) price. After my experiments I’ve reached a few conclusions.

As for Mach3, it is a commercial product with a lot going for it as it gets recommendations from many people including my good friend Dave Hylands. Usually that is good enough for me, except it would have been more convenient for me to run something capable of good performance on a spare 500 Mhz K6 system I had sitting around. And another friend Stig Pedersen recommended EMC. Sure I might have been a bit hopeful for this older system but I figured that Linux should be better on such low-end hardware than Windows, right? Fortunately the Linux CNC project has a downloadable Live Image CD so it was easy enough to test.

Mach3 has a few things going for it:

  • Absolutely dead-easy to get running on a modern Windows system;
  • Moderately simple to set up with my Xylotek controller & Sherline mill;
  • Quite a few basic “CAM-like” wizards to generate decent G-Code for single operations.

I was able to get up and running with this in a matter of minutes. My first experiments to create a circular pocket (last weekend) were qutie simple due to the simplicity of Mach3, so I figured more experiments were going to be trivial this weekend with an attempt to do basic surfacing. Unfortunately the CAM wizards are quite haphazd in design, they are neither consistent in layout nor in quality. It took me the better part of an hour to figure it out but eventually I was able to face my 3×4 inch aluminum block. Strike one for Mach3 in the sense that I had higher hopes.

Then I tried to boot into EMC2 using my intended target system. EMC doesn’t have any of the “nice” CAM wizards that Mach3 has, and it suffers from a lack of setup documentation. But heck that isn’t the open source way so I can’t say I’m surprised. In fact the documentation is really very, very poor by comparison and I wouldn’t say the Mach3 guide is that great. But eventually I managed to get a decent configuration from EMC with good performance.

This whole thing was generally unsuccessful on the low-end system but not without a lot of comedy; the basic units for setting up EMC are different than Mach3 (inches per second rather than inches per minute) so there was some nasty noises from my brand new stepper motors. Opps.

The conclusion is that a 500 Mhz machine is no where near good enough to run this software. I don’t care what their FAQ says, forget about it with such a system.

I also didn’t like the lack of keyboard configuration (or UI configuration in general) but I could probably learn to live with it. I also found the default interface (AXIS) to be a bit clumsy but later came to appreciate accept it after working with it for a few hours.

I made the rest of my test using my 3Ghz Pentium machine instead (which in retrospect was good because it was the same hardware as I was using for my Mach3 trials).

I found that EMC seemed to run my Xylotek stepper motors more smoothly. I distnctly heard a very different sound from Mach3 when I was aggresively moving the mouse. I was never able to observe a problem in the consistency of tracking e.g. it didn’t loose steps, but it was very disturbing anyways. No such issues occurred when using EMC. I was swayed by this quite a bit especially because the Windows box running Mach3 was also set up with quite a bit of other s/w I wasn’t willing to part with just yet.

Otherwise I’d say it came down to these things:

  • Mach3 has a complex screen with many options I won’t use, while EMC is much simpler;
  • Mach3 is more configurable and easier to set up than EMC;
  • The CAM wizards in Mach3 are ok but not stupendous; the Newfangled Solutions versions are better than the default ones but cost more money; there are no such equivalents in EMC;
  • EMC is capable enough to run 2.5D G-Code as long as you can generate it from other programs or from writing it yourself.

EMC takes some getting used to but appears to be a viable alternative for people who are willing to invest a little bit more patience than required for Mach3. I think I’ll stick with it although it won’t work on the system I originally intended to use for it. Until I pick up another system I’ll just dual-boot.

For those simple CAM operations I’ll probably end up using SheetCAM but that is a separate story.

December 2, 2007

DD-WRT Goodness

Filed under: Software,Uncategorized — Bob @ 2:37 pm

DD-WRTYesterday afternoon, for absolutely no apparent reason, my stock WRT54G wireless router stopped communicating with the outside world. I could reach various computers internally and even reach the configuration for the WRT54G but otherwise couldn’t surf.
I downloaded a firmware update and that didn’t help either. I downgraded the firmware to something quite old and like magic it worked again for all the computers in the house except for my Dell laptop (seemed like it could no longer authenticate). Sigh. The diagnostics built into the Linksys firmware to troubleshoot this sort of problem is pretty much non-existent.

I was ready to run out and buy a new router today but figured first I’d give some of the alternative open source firmware a go to see if they might have some better diagnostics. Before long I discovered DD-WRT and proceeded to download and install their “standard” edition.

Happy-happy-joy-joy. After installation all the computers in the house could access the internet. This firmware actually resolved my original problem, which likely was either a faulty firmware issue from Linksys or some compatibility problem with Shaw’s network, I never did figure out which. Another benefit was having access to the transmission power control. I was able to increase the power slightly to get better reception on the far side of my house.

The user interface is very well done (equal or better than the original Linksys I’d say) and the whole thing is open source. How cool is that? I’d highly recommend it even if you don’t have problems with the stock WRT54G firmware. Plus they support a wide range of consumer routers.

August 21, 2007

What I Did With My Summer Vacation

Filed under: Electronics,Software — Bob @ 8:07 pm

We just returned from ten days away on Salt Spring Island doing not a lot. It was one of those holidays where we didn’t have any plans except to relax, drink some wine, read some books, and enjoy ourselves. Except that I kept myself busy with a couple of electronics projects and my ever-expanding library of robotics-related code.

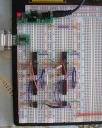
implementation.jpgI’ve become really interested in using the Controller Area Network technology to have multiple processors communicating together. While researching the options I found this project: CAN-CAN. I liked the simplicity of using the Microchip MCP2515 and it’s less expensive than using one of the Atmel processors with built-in CAN support. And this project really made it easy, I starting thinking it was something I could probably do. So I did! Here is the schematic for my version.

My first project used two separate ATMega8 processors talking to each other over a CAN bus. I read through the source code from the original project but figured I could build my own version, integrated into my own library of code for my robots. I made a number of improvements, making it easier to configure for different hardware. The main program sends a short text string from one processor to the other, where the case is reversed (uppercase to lowercase and vice versa) and a reply is sent back. Here is a picture of what it looks like in action on the screen.

I spent part of my holiday cleaning up the code and implementing interrupt-driven TX and RX. The fun didn’t stop there though. I wrote a second program that “sniffs” the CAN bus and pretty-prints out each message. This has turned out to be very useful while developing other programs with the library (more on this later).

I’ve packaged up my entire library plus these two demonstration programs and made it available for download here. There isn’t a lot of instructions but I’ll probably try to put together something in the future (maybe my next holiday?).

« Previous PageNext Page »
Powered by: WordPress