Welcome to Bob & Eileen's web site. Bob generally blogs here while Eileen blogs over at her site. You can see our photos from here or click the little camera in the upper right corner.

Calendar

May 2024
S M T W T F S
 1234
567891011
12131415161718
19202122232425
262728293031  

April 17, 2008

DXF export from Inkscape

Filed under: Machining,Software — Bob @ 8:34 pm

I’ve been using SheetCam to generate g-code for my CNC mill and so far I’m pretty happy with it. It probably isn’t the top-of-the-line CAM software available but its (so far) doing the job for me. SheetCam consumes DXF files – a vector format originated by AutoCad. So I needed something that would generate DXF and I wanted something simple. Someday I’ll probably want to invest in a high-end CAD program but for now I really wanted something very simple and very cheap or even free. I immediately thought of Inkscape, the free vector drawing program for Windows and Linux.

I’ve been using Inkscape for other projects for quite a while and I had noticed it would export to DXF so I thought I was all set: just draw my part outlines in Inkscape and export a file for SheetCam. My first experiment with one simple path object was successful so I optimistically figured everything else would simply work. Oh that would have been too easy…

First I discovered that the Inkscape DXF export doesn’t support layers. It also doesn’t support objects other than paths (Inkscape treats rectangles and circles and such as objects other than basic paths) so my exported files were mostly blank. Although figuring out these problems took quite a while because I (naively) thought all of this would simply work so I didn’t bother to research it very deeply from the start.

So I started to dig into the problem in the Inkscape bug database and sure enough there were two additional problems highlighted:

  1. the DXF export did not support objects with the “transform” attribute; this meant that sometimes objects were simply in the wrong position and it was hard to know when it could happen without exceptionally detailed proof-reading
  2. the DXF export didn’t produce “usable” DXF for at least some readers; SheetCam wasn’t mentioned by name but it seemed that maybe it wasn’t an uncommon problem

Through my own experimentation I found that SheetCam didn’t import the SPLINE objects from the DXF correctly (they were highly distorted). I will say that the SheetCam support was very helpful in explaining the problem as well as making a couple of useful suggestions that I could do inside Inkscape manually.

It worked, but I really wanted an automated solution to as many of these problems as possible.

Fortunately I discovered that Inkscape’s export module is written in Python and I could easily modify it. So I rolled up my sleeves and made my own version of the DXF export module that solves my problems. I started with the updated version from that Inkscape bug but added logic to save the layer identifier for each object and (using a separate Inkscape module) convert cubic paths into line segments (flattening) automatically. I also fixed up the problem with the “transform” attribute. It still doesn’t deal with arbitrary object types but that is pretty easy to solve (Select All, Convert Objects to Paths).

So now its back to the design stage for my next milling project!

For anyone who is interested, visit this page to download all of the required files.

April 12, 2008

Snapped Endmill

Filed under: Machining — Bob @ 7:38 pm

Snap!
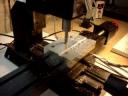
One of the downsides of a CNC mill: when the toolbit gets hung up it is easy to snap it off. That is exactly what happened to me today while cutting a 3/16″ slot 3/8″ deep in aluminum.

The debris doesn’t clear very well from such a slot so I was periodically brushing the chips away. What I didn’t realize is that the chips need to be cleaned more frequently as the slot gets deeper. This would have been obvious if I’d been doing it by hand, but of course when I’m sitting back watching the machine work I had no idea of the stress that was building up. It was on the last pass when I heard the steppers start to whine as they were working much, much harder. I quickly hit the emergency stop button but it was too late. The picture here shows the result.

Fortunately the Sherline end mills are double-ended so I’ve got another one to work with. I’ll have to order a replacement though, and next time I’ll be much more cautious about this.

On a similar topic, I have been using SheetCam for generating g-code and EMC2 for running the mill today and I really quite like the combination. I’ve been frustated with the DXF generation from Inkscape but that is a different story altogether. As soon as I get everything set up again I’ll capture some video of the process and pictures of the results.

April 6, 2008

CNC Controller Software

Filed under: Machining,Software — Bob @ 9:01 pm

Today I spent a few hours experimenting with Mach3 vs. EMC2 (the leading Linux based alternative) for running my CNC mill. I was initially skeptical of EMC due to the fact that it didn’t seem to have a lot going for it except for the (lack of) price. After my experiments I’ve reached a few conclusions.

As for Mach3, it is a commercial product with a lot going for it as it gets recommendations from many people including my good friend Dave Hylands. Usually that is good enough for me, except it would have been more convenient for me to run something capable of good performance on a spare 500 Mhz K6 system I had sitting around. And another friend Stig Pedersen recommended EMC. Sure I might have been a bit hopeful for this older system but I figured that Linux should be better on such low-end hardware than Windows, right? Fortunately the Linux CNC project has a downloadable Live Image CD so it was easy enough to test.

Mach3 has a few things going for it:

  • Absolutely dead-easy to get running on a modern Windows system;
  • Moderately simple to set up with my Xylotek controller & Sherline mill;
  • Quite a few basic “CAM-like” wizards to generate decent G-Code for single operations.

I was able to get up and running with this in a matter of minutes. My first experiments to create a circular pocket (last weekend) were qutie simple due to the simplicity of Mach3, so I figured more experiments were going to be trivial this weekend with an attempt to do basic surfacing. Unfortunately the CAM wizards are quite haphazd in design, they are neither consistent in layout nor in quality. It took me the better part of an hour to figure it out but eventually I was able to face my 3×4 inch aluminum block. Strike one for Mach3 in the sense that I had higher hopes.

Then I tried to boot into EMC2 using my intended target system. EMC doesn’t have any of the “nice” CAM wizards that Mach3 has, and it suffers from a lack of setup documentation. But heck that isn’t the open source way so I can’t say I’m surprised. In fact the documentation is really very, very poor by comparison and I wouldn’t say the Mach3 guide is that great. But eventually I managed to get a decent configuration from EMC with good performance.

This whole thing was generally unsuccessful on the low-end system but not without a lot of comedy; the basic units for setting up EMC are different than Mach3 (inches per second rather than inches per minute) so there was some nasty noises from my brand new stepper motors. Opps.

The conclusion is that a 500 Mhz machine is no where near good enough to run this software. I don’t care what their FAQ says, forget about it with such a system.

I also didn’t like the lack of keyboard configuration (or UI configuration in general) but I could probably learn to live with it. I also found the default interface (AXIS) to be a bit clumsy but later came to appreciate accept it after working with it for a few hours.

I made the rest of my test using my 3Ghz Pentium machine instead (which in retrospect was good because it was the same hardware as I was using for my Mach3 trials).

I found that EMC seemed to run my Xylotek stepper motors more smoothly. I distnctly heard a very different sound from Mach3 when I was aggresively moving the mouse. I was never able to observe a problem in the consistency of tracking e.g. it didn’t loose steps, but it was very disturbing anyways. No such issues occurred when using EMC. I was swayed by this quite a bit especially because the Windows box running Mach3 was also set up with quite a bit of other s/w I wasn’t willing to part with just yet.

Otherwise I’d say it came down to these things:

  • Mach3 has a complex screen with many options I won’t use, while EMC is much simpler;
  • Mach3 is more configurable and easier to set up than EMC;
  • The CAM wizards in Mach3 are ok but not stupendous; the Newfangled Solutions versions are better than the default ones but cost more money; there are no such equivalents in EMC;
  • EMC is capable enough to run 2.5D G-Code as long as you can generate it from other programs or from writing it yourself.

EMC takes some getting used to but appears to be a viable alternative for people who are willing to invest a little bit more patience than required for Mach3. I think I’ll stick with it although it won’t work on the system I originally intended to use for it. Until I pick up another system I’ll just dual-boot.

For those simple CAM operations I’ll probably end up using SheetCAM but that is a separate story.

March 31, 2008

CNC Milling

Filed under: Machining — Bob @ 9:03 pm

First Milling OperationI added some more pictures of my work area here. It hasn’t been this clean in over a year, and yet I’d be embarrassed to show you the mess looming on the opposite side of the room.

After I completed the furniture rearranging and general clean up I was ready to spin up the mill and do something, so I secured a scrap piece of aluminum to the mill and set up the software to cut a 0.2″ deep 1.5″ diameter pocket. Given this was the first time I was running the mill under computer control I set up everything carefully and made many trial runs without tooling. I also set the feed rate very low for the actual operation so it took 45 minutes to complete the operation. Even so, it was terribly exciting!

I made a short video clip of three different parts of the operation. The variable lighting was due to the sunlight streaking in the window behind the mill. Hope you enjoy it (click either the picture or here to watch).

March 29, 2008

CNC Milling

Filed under: Machining — Bob @ 7:18 pm

cnc-upgrade-750.jpgOh happy, happy, joy, joy! My Sherline mill is now under computer control! The picture shows my mill with the steppers installed but I hadn’t yet remounted the head stock & motor. You’ll also notice I cleaned up all the aluminum chips! I filled a small garbage bag with debris from previous milling operations.

A few weeks ago I ordered a CNC stepper and controller from Xylotex and it arrived last Thursday. It was packaged very well and arrived in perfect condition. I spent the afternoon today installing the Sherline CNC conversion kit and the Xylotex kit.

I’d been worried about installing the stepper mount as the directions indicated I’d need to drill and tap holes in my existing mill. As it turned out the X and Y axis were already drilled and tapped but the Z axis still required the extra work. Overall the installation went smoothly. The Sherline instructions were ok but were a bit light on detail – I guess they expect you to know your mill inside and out, which I really didn’t. I got a good introduction today though, and now I know such things as the X axis lead screw is a right hand thread.

The Xylotex kit was pre-assembled so there wasn’t really anything to do except mount the steppers and plug everything together. Of course by itself it doesn’t really do much, as it requires the computer and some software to drive it. I opted to give the Mach3 demo a try based on a recommendation, and so far I really like it. I need to clean up my work area to locate the computer closer to the mill (I’ve got cables stretched around rather awkwardly right now). I ran a few tests to move the steppers around and so far the whole thing is working really, really well. The alternative is EMC which is what Sherline uses in their full CNC mill package. It runs on Linux and has a “live cd” boot image.

I took a few photos during the installation, you can see the gallery here.

Tomorrow I plan to fix up the work area and try to actually cut some metal. I’ll probably end up purchasing Mach3 as I’ve been quite happy with the built-in CAM tools for simple operations like square or circular pockets. Yippe!

« Previous PageNext Page »
Powered by: WordPress